

Table of Contents
Ticks not only being an annoyance for your pets, but can carry dangerous diseases such as Lyme disease, Ehrlichiosis, and Rocky Mountain spotted fever. As a responsible dog owner, it’s crucial to know how to safely remove ticks to protect your dog from health problems. This guide provides steps on how to properly remove ticks from dogs without errors.
Identifying Ticks on Dogs
Before removing ticks, you must recognize them. Ticks are small, spider-like parasites that latch onto a dog’s skin and suck blood. They vary in size and color, ranging from brown, gray, or black, and swell up to the size of a pea after feeding.
Common Tick Areas:
- Around the ears
- Between the toes
- Under the collar
- Armpits or groin
- Face and neck
Symptoms include your dog excessively scratching, biting, or licking certain areas, and visible ticks upon inspection.
Tools You Will Need
-Fine-tipped tweezers or a tick removal tool (available in pet stores)
-Gloves to avoid direct contact
-Antiseptic (rubbing alcohol or solution)
-A small container with a lid to store the tick
-Treats to reward your dog
How to Remove Ticks
Step 1: Keep Your Dog Calm and Still
Make sure your dog is calm and relaxed before removing ticks. Ask someone to help hold the dog if needed, speaking in soothing tones.
Step 2: Put on Gloves
Wear gloves to protect yourself from possible tick-borne diseases that can affect humans.
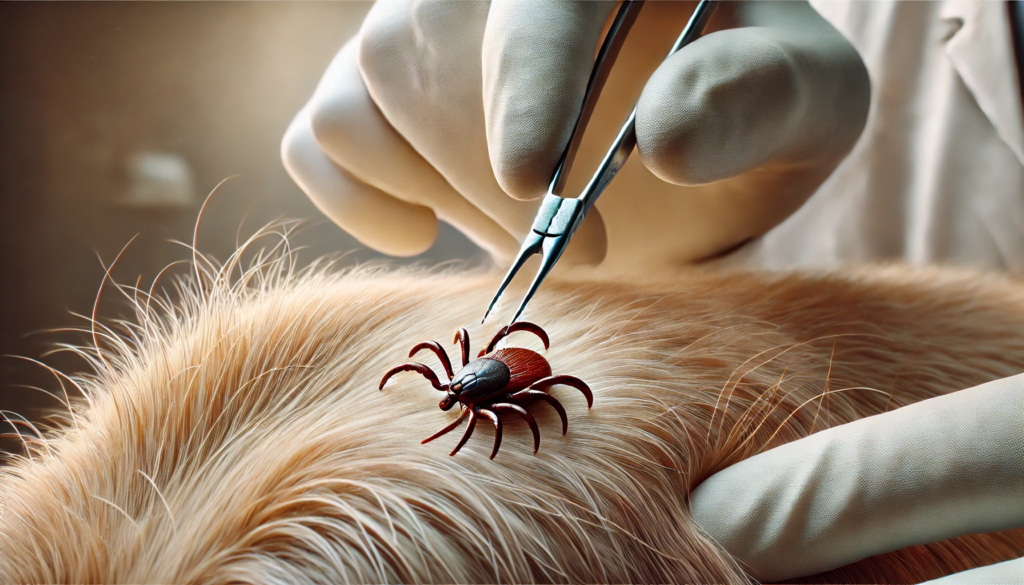
Step 3: Use Tweezers or Tick Remover
Tweezers: Grasp the tick close to your dog’s skin with fine-tipped tweezers. Avoid squeezing the tick’s body, as this can push harmful bacteria into your dog’s bloodstream.
Tick Removal Tool: Follow the instructions on the tool, typically designed to slide under the tick without squeezing.
Step 4: Gently Pull the Tick Out
Use steady pressure to pull the tick straight out. Do not twist or jerk, as this may leave the tick’s mouthparts lodged in the skin.
Step 5: Dispose of the Tick
Place the tick in a container with rubbing alcohol or seal it in a plastic bag for safe disposal. Never crush it with your fingers.
Step 6: Clean the Bite Area
Clean the area with antiseptic and apply dog-safe antibiotic ointment if needed.
Step 7: Monitor Your Dog
Watch for symptoms like lethargy, appetite loss, joint pain, or fever in the following weeks. If you notice any, consult a vet immediately.
Preventing Future Tick Infestations
- Use tick preventatives such as topicals, collars, or oral medications recommended by your vet.
- Check your dog regularly, especially after walks in wooded or grassy areas.
- Keep your yard tidy by mowing the lawn and removing leaf litter.
- Bathe your dog with tick shampoos to kill and repel ticks.
- Some natural remedies, like lavender or eucalyptus oils, can help keep ticks away.
When to Call the Vet
- If part of the tick’s mouth remains embedded.
- If there are signs of infection, such as redness or swelling.
- If your dog shows symptoms like lethargy, fever, or joint pain after a tick bite.
Common Tick-Borne Diseases
- Lyme Disease: Symptoms include lameness, swollen joints, fever, and lethargy.
- Ehrlichiosis: Symptoms include weight loss, fever, and bruising.
- Anaplasmosis: Symptoms include lameness, joint pain, fever, and vomiting.
Final Thoughts:
Removing ticks can be done safely at home with the right tools and knowledge. Regular checks and timely removal are essential for keeping your dog tick-free and healthy. Consult a veterinarian if you’re unsure or notice signs of illness.
By being proactive and vigilant, you can ensure your dog stays tick-free and healthy throughout the year.
You can also check out these necessary accessories for you Dog: